Author Topic: Bill's 1 Ton TJ Build  (Read 42660 times)

Offline Bill3753

  • Honorary Member
  • Rock Crawler
  • ***
  • Posts: 476
Re: Bill's 1 Ton TJ Build
« Reply #90 on: July 24, 2011, 03:37:26 AM »
So, its been forever and a day since I updated this thread.  Figured I'd post some updated pictures and talk about the progress a little

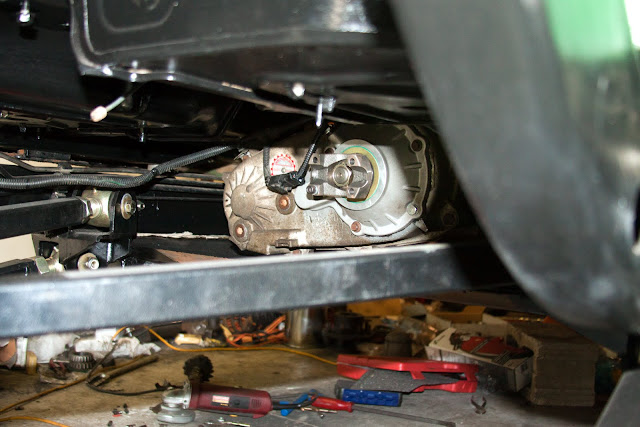
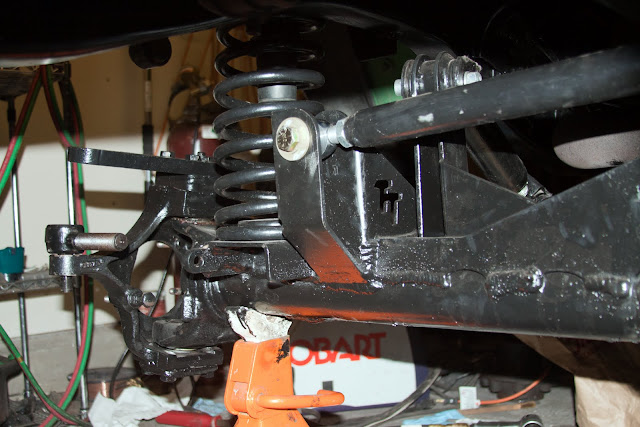
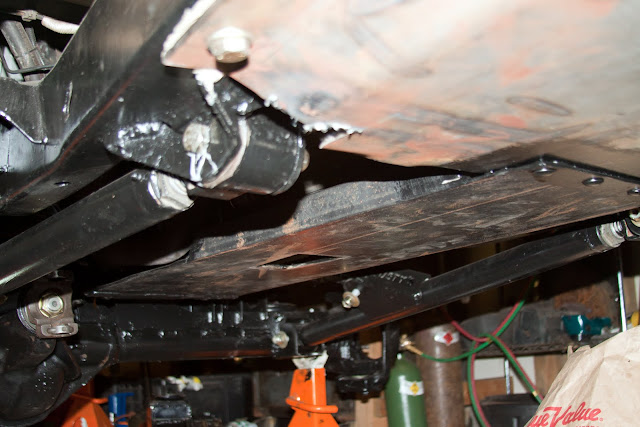
Here are a few more of the rear suspension with the belly skid and trans mount installed:


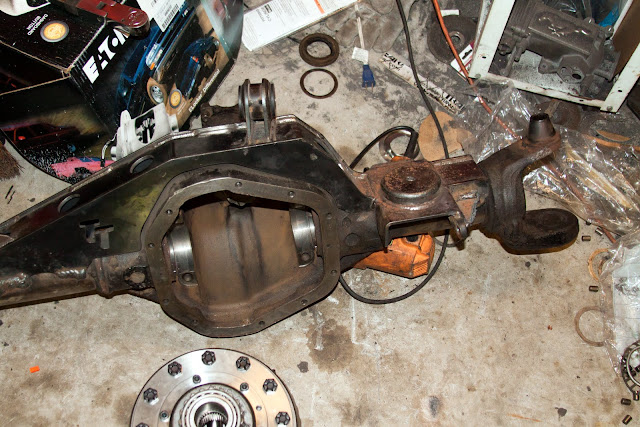
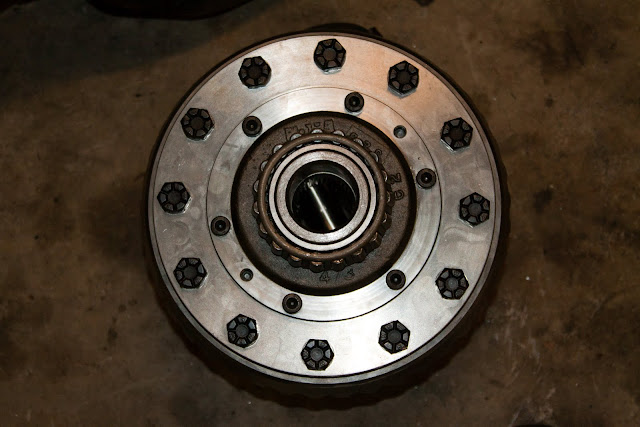
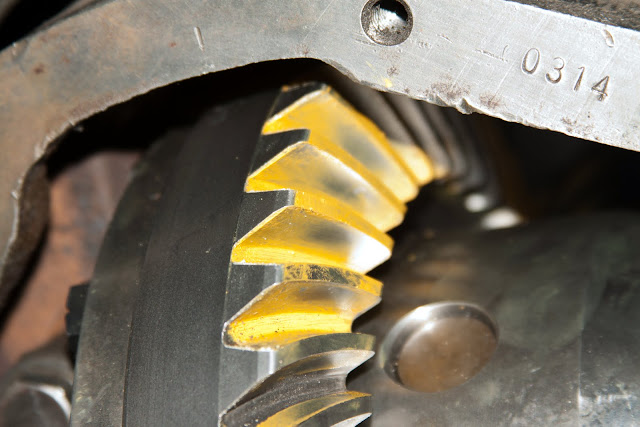
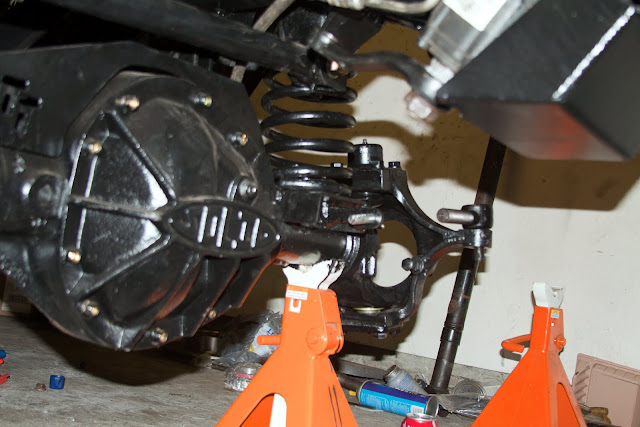
These next few were during the start of the front locker and gear install:


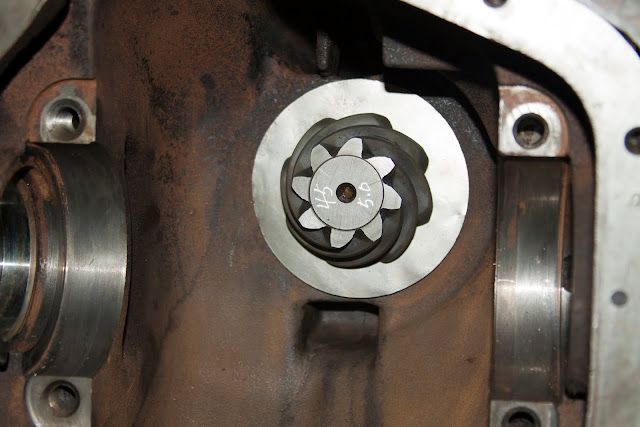
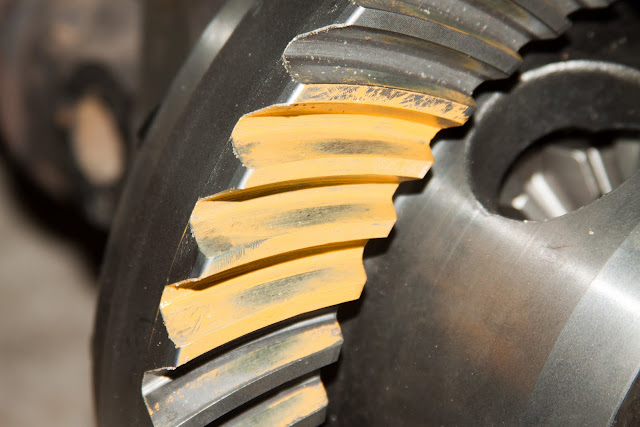
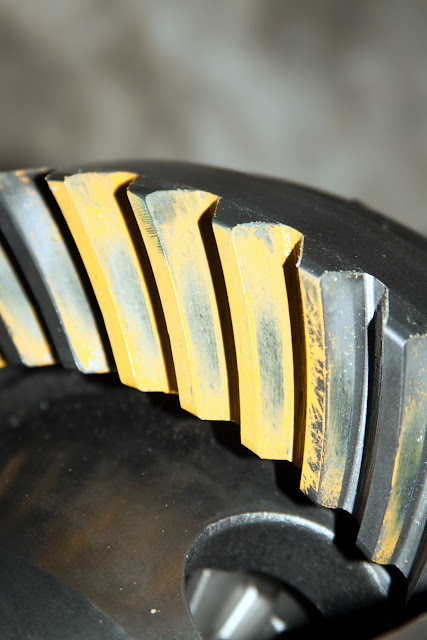
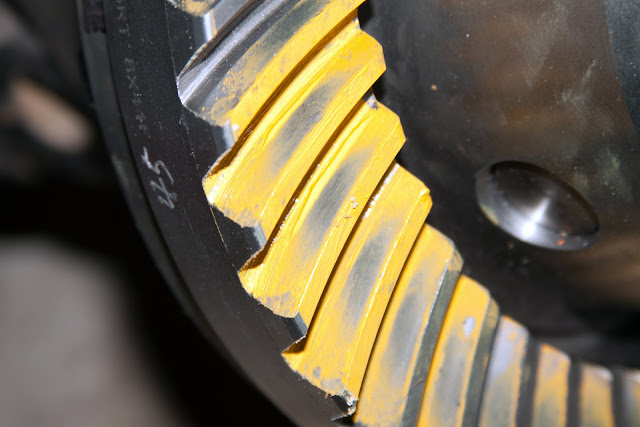
Here are a few of the first inital contact pattern after calculating my starting shim stacks:


I got that far on the install and said "screw it, I'm buying some new toys":


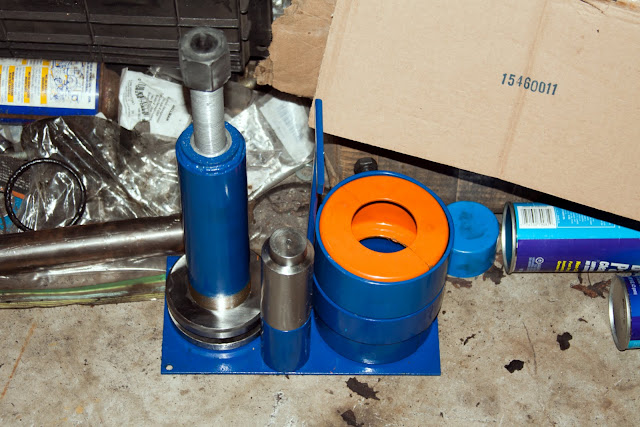
The install was extremely easy after that.

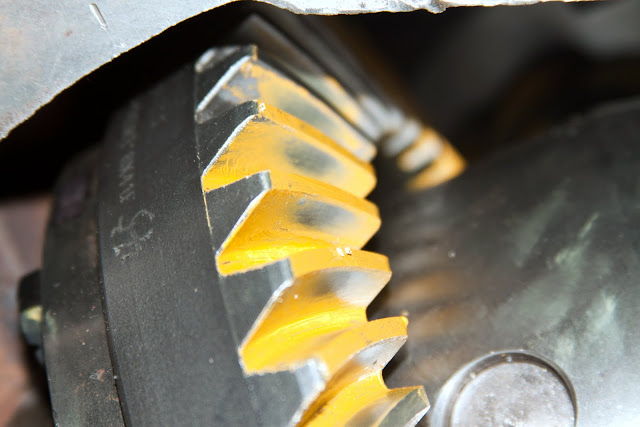
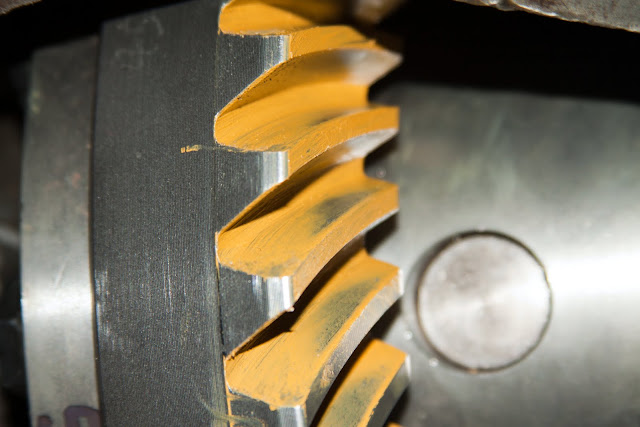
These are of the second contact pattern after increasing pinion depth:


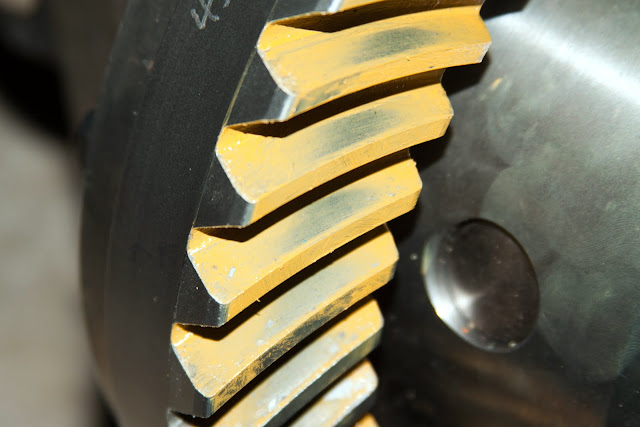
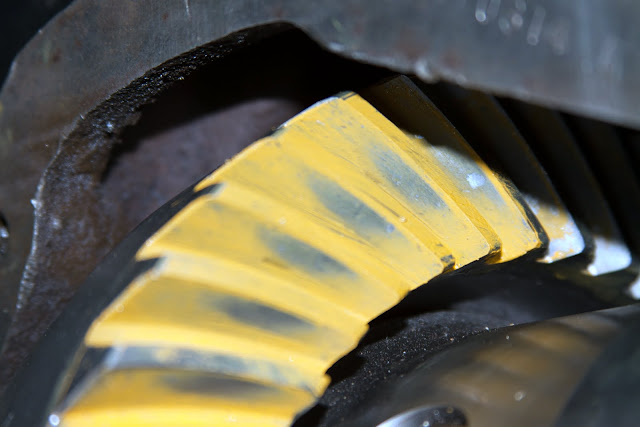
These are the third adjustment (still using set up bearings).  Increased pinion depth a little more and fine tuned the backlash:


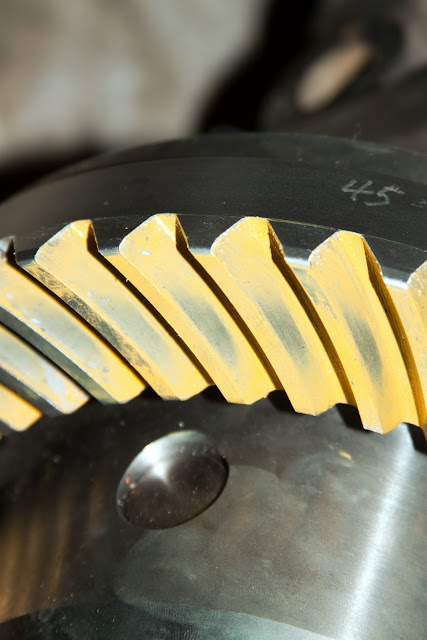
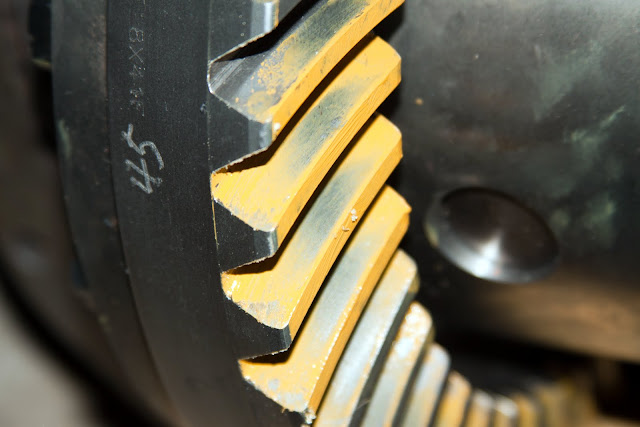
Finally, I installed the new good bearings on the carrier and pinion along with the new inner race.  Here is my final contact pattern:


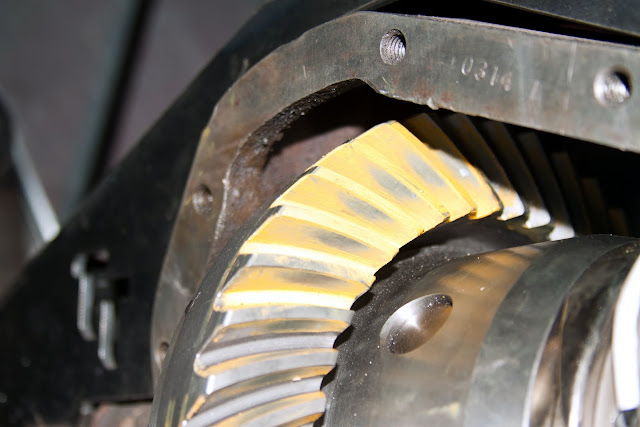
I'm very happy with the results.  The pictures don't really show the contact pattern very well, but it is good.  The wires for the locker are installed and through the differental housing as well.

Final Backlash is 0.006" with 0.010" to 0.012" of carrier bearing preload.  Pinion bearing preload ended up at 28 in/lbs.

From there, I did a TON of painting.  The entire underbody and frame has been prepped and painted with Chassis Saver paint.

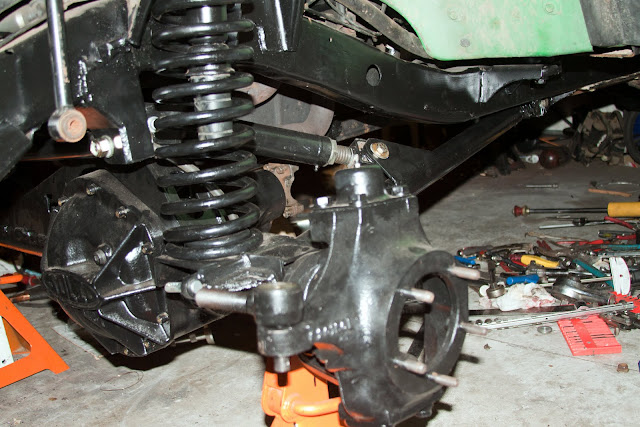
After that, I installed the front axle.  The springs are in there for now, but will have to come back out one more time before its all said and done.  Also, the crap high steer arm on the passenger side knuckle is getting replaced with a much better one from East Coast Gear Supply.  Some day, I'll replace the knuckes with some the better Reid ones, but I already have all new brakes and bearings for the Ford stuff, so I'm not switching them to Chevy ones now.


This one is of the engine skid I built.


And here is one of the wires for the locker and where I drilled the differental to run them through.


So, thats about it for now.  I imagine I could take a few more as the Genright tank is in now too, but I guess thats good enough for the time being.  All that is left to complete everything under the Jeep is install the spindles, hubs, and brakes, install the rear drive shaft I got from Tom Woods, shorten and install the front drive shaft, run new brake lines and blead the brakes, and hook up the fuel lines.

After that I'll be finishing up the body work.  I recently ordered a set of Genright Highline tube fenders, rear stretch tube fenders, and mini boat sides to finish it all off, but have not recieved them yet.  I already have full corner armor that started as blanks and were cut to fit the stretch.  The tire carrier is going to be the Genright fold down rear stinger carrier and I'll be converting the tail gate to a fold down gate at the same time.

I'm also going to build or buy a front stinger bumper soon as well.  I have the stuff to build one, but in the intrest of getting this thing done I may just buy one.  If I just buy one, I'll be selling my Warn front bumper if anyone is interested.

Anyways, thats about it for now.
« Last Edit: July 24, 2011, 05:47:22 AM by Bill3753 »
04 TJ, HP60, 14 Bolt, 5.13's, linked, locked, on 38's and (still) in the works.

Offline Flex

  • Honorary Member
  • Trail Master
  • ***
  • Posts: 772
Re: Bill's 1 Ton TJ Build
« Reply #91 on: July 24, 2011, 02:34:37 PM »
What made u decide to go with tube fenders vice moving them up.
2000 XJ Sport 6.5 inch TNT Longarms, 36" IROK Radials, HP dana 30, Ford 8.8 aussie locker, 4.10s, front bumper with stinger and 9500 mile maker winch, Rock Sliders, OBA. full exo cage, chopped.
2005 F-150

-Nate

Offline Bill3753

  • Honorary Member
  • Rock Crawler
  • ***
  • Posts: 476
Re: Bill's 1 Ton TJ Build
« Reply #92 on: July 24, 2011, 03:09:25 PM »
The rear flares were not working out as well as I was hoping.  Genright had some that would do exactly what I wanted, so just decided to run front and rear tubes and sell what I already have.
04 TJ, HP60, 14 Bolt, 5.13's, linked, locked, on 38's and (still) in the works.

Offline Mr Rock

  • Administrator
  • Trail Master
  • *****
  • Posts: 1571
Re: Bill's 1 Ton TJ Build
« Reply #93 on: July 25, 2011, 03:30:40 PM »
So you're selling the blank rear corners? I think you told me that they were YJ blanks, depending on how far back you cut them I may be interested!
'89, 4.2, NUTTERED, Team Rush, 4" Lift, 1" BL, 1" MML & HD shackles , Flat Belly Skid, SYE, 36 x 13.50s
XRC8, 150w KC's, Herculined, Tauras Elec Fan, Dual Batteries, Aussie in front, 8.8, TJ flares & Spool in rear, topless all of the time!

Offline Bill3753

  • Honorary Member
  • Rock Crawler
  • ***
  • Posts: 476
Re: Bill's 1 Ton TJ Build
« Reply #94 on: July 25, 2011, 04:28:30 PM »
I'm just going to be selling the 7" stock type flares.  What I got was tube flares that I will mount on the corners, so they are not going to be up for sale.

What I was talking to you about Rock was the crap thin aluminum short corners that were on my Jeep originally.  As it tuned out, they were YJ corners that someone cut up to fit a TJ.  Also, they were rather bent from me smacking them on trees.

I do have a set of YJ Short corners in steel that are new in the box if you'd be interested in those though.
04 TJ, HP60, 14 Bolt, 5.13's, linked, locked, on 38's and (still) in the works.

Offline Mr Rock

  • Administrator
  • Trail Master
  • *****
  • Posts: 1571
Re: Bill's 1 Ton TJ Build
« Reply #95 on: July 26, 2011, 11:27:06 PM »
sent you a PM
'89, 4.2, NUTTERED, Team Rush, 4" Lift, 1" BL, 1" MML & HD shackles , Flat Belly Skid, SYE, 36 x 13.50s
XRC8, 150w KC's, Herculined, Tauras Elec Fan, Dual Batteries, Aussie in front, 8.8, TJ flares & Spool in rear, topless all of the time!

Offline Bill3753

  • Honorary Member
  • Rock Crawler
  • ***
  • Posts: 476
Re: Bill's 1 Ton TJ Build
« Reply #96 on: December 14, 2011, 03:01:22 AM »
Its a sad day when you have to go more then a whole page back to bump your own build thread...  :'(

Anyways, you guys might not believe it but today I made good progress on my build!

So, without further adieu my update.  Today, I was able to pull the driver side front fender.  This gave me the room I needed to drill out the nylon steering shaft retainer to allow the steering shaft to collapse shorter.  This is needed to make way for the new larger steering box as seen here:


After that, I installed the new longer and flat pitman arm.


Next up was starting in on the tie rod.


From there I built the drag link and cycled the steering.  I am happy now.  Full lock to lock turning on a HP60.   ;D

Here is an idea of what the finished product will look like.


However, the day did have a few problems I thought I was going to be able to avoid.

First, the longer flat pitman arm I need to get full lock to lock turning hits the lower radiator connection.  I was hoping with my body lift it would clear, but as you can see it does not.


To fix this, I am going to raise the radiator slightly, maybe 3/4" or so.  That will allow everything to clear.

Next problem is with the tie rod itself, or I guess its actually a problem with the knuckles that effects the tie rod ends.  To flip the tie rod to the top of the knuckle, I ordered tapered bushings from Parts Mike.  The idea is you drill the knuckle with a 7/8" drill bit, insert the bushing, and tighten the rod end down thereby sandwiching the bushing out to hold it in place.  Anyways, when installed and tighened down my rod ends are tight against the top of the knuckle.  If I leave it this way, it'll break tie rods ends left and right or worse and break the knuckle.  Here is a close up of what I'm talking about.


This is what it should look like installed and torqued:


Notice the difference in the gap from the bottom of the tie rod to the mounting surface.  In the first picture there is NO flex in the joint because its bottomed out.  In the second, it moves just like it should.

My plan to fix this is to use Chevy 7/8" drag link rod ends, Part number ES2026R and ES2027L.  These rod ends use the same thread as the other ones I was using, but have a longer taper on them.  They are designed to allow for more flex.  If you look close at my drag link, I am already using one of them on the pitman arm end of the link.  Anyways, I'm thinking since these have a longer taper there will be enough left once it is tighened down to still allow for movement in the joint.

An additional note: I understand the track bar and drag link angles are slightly off from each other and it is going to stay that way.  Yes, there is probably something I could do by putting a bend in the track bar to get them equal, but I don't care that much.  I'm not worried about bump steer on this rig.  Also, being that I am building it low lift on 1 ton axles, there isn't much room in there to move things around much anyways.  It is as close as I could get it to equal without bending the track bar or going to a different style steering set up.  I wanted crossover steering, so this is how it will be.

Next up is to fix the tie rod and then mount the hydro assist cylinder (as seen just sitting there in a few of the pictures).  After that, I'll run all the fluid lines, install the new power steering pump and cooler, and check it all for leaks.
« Last Edit: December 14, 2011, 03:22:27 AM by Bill3753 »
04 TJ, HP60, 14 Bolt, 5.13's, linked, locked, on 38's and (still) in the works.

Offline Flex

  • Honorary Member
  • Trail Master
  • ***
  • Posts: 772
Re: Bill's 1 Ton TJ Build
« Reply #97 on: January 03, 2012, 03:23:29 PM »
Bill wants to cut a hole is his hood b/c with a motor mount lift his super charger doesn't clear, someone come up with a better idea quick before he does it.
« Last Edit: January 04, 2012, 01:20:32 AM by Flex »
2000 XJ Sport 6.5 inch TNT Longarms, 36" IROK Radials, HP dana 30, Ford 8.8 aussie locker, 4.10s, front bumper with stinger and 9500 mile maker winch, Rock Sliders, OBA. full exo cage, chopped.
2005 F-150

-Nate

Offline Mr Rock

  • Administrator
  • Trail Master
  • *****
  • Posts: 1571
Re: Bill's 1 Ton TJ Build
« Reply #98 on: January 03, 2012, 06:48:28 PM »
What about installing one of those cowl induction hood scopes in the center of your hood. It should give you the room you need but still keep the hood closed up?
'89, 4.2, NUTTERED, Team Rush, 4" Lift, 1" BL, 1" MML & HD shackles , Flat Belly Skid, SYE, 36 x 13.50s
XRC8, 150w KC's, Herculined, Tauras Elec Fan, Dual Batteries, Aussie in front, 8.8, TJ flares & Spool in rear, topless all of the time!

Offline Bill3753

  • Honorary Member
  • Rock Crawler
  • ***
  • Posts: 476
Re: Bill's 1 Ton TJ Build
« Reply #99 on: January 03, 2012, 11:35:39 PM »
What about installing one of those cowl induction hood scopes in the center of your hood. It should give you the room you need but still keep the hood closed up?

I'll post pictures later tonight of exactly what is going on.  Problem with a cowl hood is the supercharger is off-centered to the driver's side.  It would either need the cowl off-centered as well or a really wide cowl.
04 TJ, HP60, 14 Bolt, 5.13's, linked, locked, on 38's and (still) in the works.

Offline Mr Rock

  • Administrator
  • Trail Master
  • *****
  • Posts: 1571
Re: Bill's 1 Ton TJ Build
« Reply #100 on: January 03, 2012, 11:51:13 PM »
What about installing one of those cowl induction hood scopes in the center of your hood. It should give you the room you need but still keep the hood closed up?

I'll post pictures later tonight of exactly what is going on.  Problem with a cowl hood is the supercharger is off-centered to the driver's side.  It would either need the cowl off-centered as well or a really wide cowl.

The old Chevy one's were pretty wide, or a custom bump out over the supercharger and a matching one on the other side might not look to bad..
'89, 4.2, NUTTERED, Team Rush, 4" Lift, 1" BL, 1" MML & HD shackles , Flat Belly Skid, SYE, 36 x 13.50s
XRC8, 150w KC's, Herculined, Tauras Elec Fan, Dual Batteries, Aussie in front, 8.8, TJ flares & Spool in rear, topless all of the time!

Offline Bill3753

  • Honorary Member
  • Rock Crawler
  • ***
  • Posts: 476
Re: Bill's 1 Ton TJ Build
« Reply #101 on: January 04, 2012, 03:15:23 AM »
Ok, so here is a little update on progress.

Notched the frame to clear the steering:


I know it looks like that is a big notch, but when you turn lock to lock with the passenger side at full bump, you need it to clear 100%.

Also, I fully welded and painted the steering and ram mount.  Fixed the tie rod end issue as well.


Next, I built a couple brackets to bolt the power steering fluid cooler to the bottom of the supercharger heat exchanger.  It is all painted and installed with the lines run and in place.  (Note: Supercharger heat exchanger is on top; power steering cooler is on the bottom)


For now, the radiator is pulled.  I also Evac'd the AC system and permanently removed the AC condenser.  Why?  Reason for this was with the two coolers in front of the AC condenser in front of the radiator.  Now, I shouldn't have overheating problems.  Before anyone says it, I already know.  Taurus electric fan conversion.


Oh, and the fenders are now both off.


Finally, here is the supercharger problem.  I needed a MML because of the flat belly skid I installed.  However, the supercharger is now hitting the hood.

Not very bad on this one.  Its VERY close though and once the hood is lower (can't fully close it yet), I'm thinking it will hit.  If it doesn't, it almost certainly will when the engine is torquing while running.


Here however, I am making direct contact:


In the sport car/muscle car world, I have seen this quite a few times before and what I was thinking of doing (the first Camaro pictured has a hack job done to it).


These two are done clean.  Its the same car actually.  The first picture shows how they masking taped the hood to protect the finish of the carbon fiber.


I am comfortable with doing a cut like this.  The down fall would be taking water in the hood.  Water crossings are not something I'm interested in, but rain.  Maybe I could build a cowl, but who knows.  No matter what I do, I'm defiantly going to have to cut the hood to make it clear.  I already have to cut the sides too for the highline, so ya.  The bigger issue here is what happens to the supercharger if I roll?  I need to keep it protected too.  My ideas for this is a big stinger in the front thereby keeping the weight on the cage and stinger.  Another was to run a removable bar over the hood in the area of the supercharger.

If anyone has ideas now that I've posted mine, let me hear them.  I've decided on holding off on putting the radiator back in and cutting the hood until after I've thought about the options more.  I have plenty of other stuff to work on till I need to make that cut.
« Last Edit: January 04, 2012, 03:31:43 AM by Bill3753 »
04 TJ, HP60, 14 Bolt, 5.13's, linked, locked, on 38's and (still) in the works.

Offline reptile610

  • Trail Master
  • *****
  • Posts: 862
Re: Bill's 1 Ton TJ Build
« Reply #102 on: January 04, 2012, 01:56:35 PM »
personally with as much money as your spending on this i would say bite the bullet and get a shop to make you a custom hood.
1982 CJ7-stock

Owning a CJ is for manly men, they allows you to do manly stuff like auto mechanics and welding and drinking beer. Manly men own CJs. Manly men do not drive hummers, they receive them.

Offline WillC

  • Honorary Member
  • Trail Master
  • ***
  • Posts: 722
Re: Bill's 1 Ton TJ Build
« Reply #103 on: January 04, 2012, 05:17:02 PM »
Look at all 4 pages of scoops, some nice double hood scoops on page 2 for under a $100.
You can turn them around so the opening is towards the windshield.

http://www.jcwhitney.com/hoods-scoops-and-ornaments/c2525j1s17.jcwx


Offline RnnngTrails

  • Honorary Member
  • Trail Master
  • ***
  • Posts: 702
    • Facebook - Gary Lynch
Re: Bill's 1 Ton TJ Build
« Reply #104 on: January 04, 2012, 08:56:16 PM »
Living in Preston. Call me if you're going wheeling!